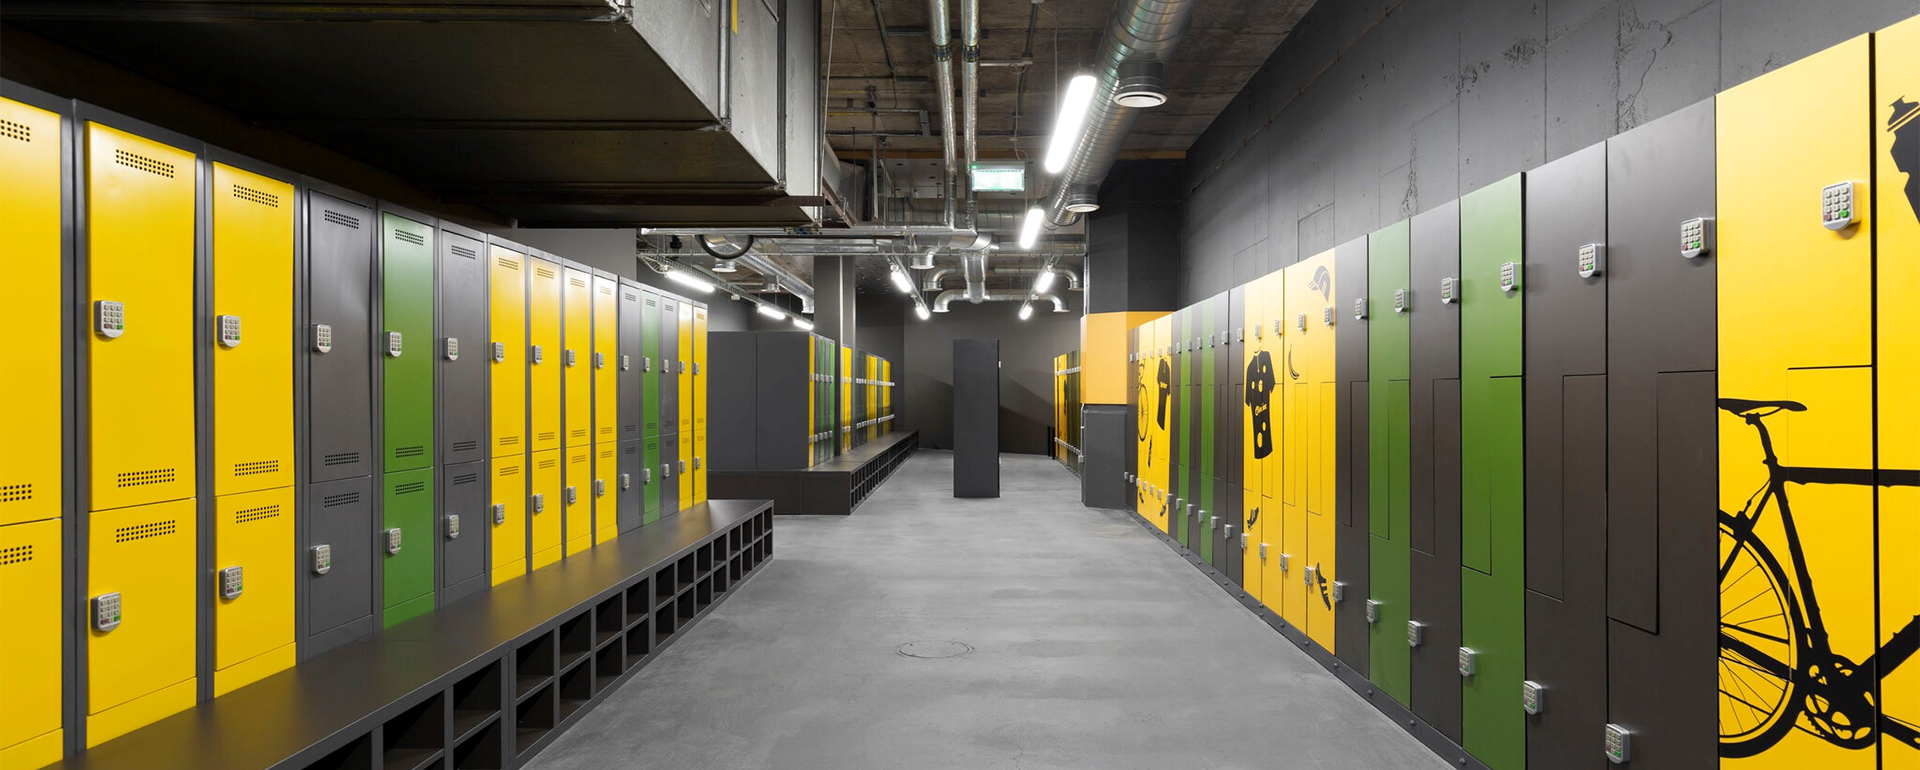
How to Install Wire Mesh Lockers for Industrial Facilities
Learning how to install wire mesh lockers is a critical skill for facility managers aiming to optimize warehouse or school storage. Proper installation ensures that your high-density storage remains secure, durable, and compliant with safety regulations. In our experience, the longevity of these units depends more on the quality of the installation than the gauge of the steel.
This technical guide covers the entire process of industrial storage locker setup. We focus on precision engineering techniques, such as squaring frames and calculating anchor pull-out strength. By following these wire locker assembly instructions, you will avoid the common pitfalls of door misalignment and structural instability. Whether you are installing personal lockers with ventilation or large tenant units, the following steps are mandatory for professional results.
What tools are required to install wire mesh lockers?
Installing wire mesh lockers requires a specific set of industrial power tools and high-grade fasteners to ensure structural integrity. You will need a hammer drill with 3/8" masonry bits, a 4-foot master level, a high-torque impact driver, and industrial-grade shims. These tools allow you to handle the weight and rigidity of security mesh lockers effectively.
Primary Power Tools
A high-quality hammer drill is necessary for penetrating industrial concrete floors. Standard drills often lack the percussion force required for deep anchor holes. Additionally, an impact driver is essential for driving carriage bolts through the welded wire panels. This tool provides the necessary torque to compress the panels without stripping the hardware. According to technical documentation from Hilti, using the correct drill bit diameter is vital for anchor performance.
Measurement and Precision Hardware
Precision is the foundation of any storage installation. A 4-foot level provides more accuracy than smaller torpedo levels when checking for floor pitch. You must also keep a variety of metal shims on hand. These shims help you compensate for uneven concrete slabs. Furthermore, ensure you have a socket set that matches your specific carriage bolts. This prevents delays during the assembly phase.
Personal Protective Equipment (PPE)
Safety should never be an afterthought during a technical installation. Industrial mesh can have sharp edges from the welding process. Therefore, your team must wear heavy-duty work gloves and safety glasses. Furthermore, wear steel-toed boots to protect against falling panels. High-visibility vests are also recommended if you are working in an active warehouse environment.
Site Preparation: Floor and Wall Analysis
Successful installation begins long before you open the first crate. You must conduct a thorough analysis of the floor and wall substrates to ensure they can support the intended load. Most industrial floors have subtle variations that can derail a project if ignored.
Evaluating Concrete Floor Pitch
Industrial concrete slabs are rarely perfectly flat. Most are designed with a 1% slope for drainage. Consequently, a locker bank that is 20 feet long can lean significantly if not shimmed. Use your level to map the high and low spots across the entire installation area. The American Concrete Institute provides specific guidelines for floor flatness that you should reference for large-scale projects.
Identifying Wall Substrates
Determine whether the lockers will be mounted against masonry, drywall, or steel studs. Each substrate requires a different anchoring strategy. For example, masonry requires sleeve anchors, while steel studs require heavy-duty toggle bolts. If you are installing lockers for schools, wall mounting is often a legal safety requirement to prevent tipping.
Cleaning the Installation Area
Remove all debris, dust, and grease from the floor surface. A clean surface ensures that your layout marks remain visible. It also allows the base plates of the lockers to sit flush against the concrete. In some cases, you may need to apply a sealant to the floor before installation. This is particularly important for antibacterial easy clean lockers used in healthcare settings.
Unboxing and Material Verification
The unboxing phase is the best time to perform quality control and verify your inventory. Missing a single bracket can stop an installation for days. We recommend organizing your materials by component type before you begin the assembly.
Inspecting Welded Wire Panels
Check each panel for shipping damage or manufacturing defects. Look for broken welds or bent mesh that could interfere with the assembly. If a panel is bent, it will be impossible to square the unit. In our experience, catching these issues early prevents wasted labor on a unit that will never be plumb.
Hardware Inventory Check
Count all carriage bolts, nuts, and washers. Most manufacturers include a small percentage of extra hardware, but you should verify this immediately. Ensure that your fasteners are zinc-plated steel to prevent corrosion. If your facility is located in a high-humidity area, consider using stainless steel hardware instead.
Organizing the Assembly Line
Create a staged assembly area. Place back panels in one stack, side panels in another, and doors in a protected area. This organization reduces the time spent searching for parts. It also minimizes the risk of tripping over components in a crowded workspace. Proper organization is a hallmark of professional industrial storage locker setup.
How do you assemble wire mesh locker panels?
Assembling wire mesh locker panels requires starting from the back and moving forward to ensure the structure is balanced. Lay the back panel flat on the floor and bolt the side panels to it using carriage bolts, keeping the nuts on the interior for security. Once the three-sided shell is standing, you can install the top and bottom plates to stabilize the frame.
Attaching Side Panels to the Back
Place the back panel on a set of sawhorses or a clean floor. Align the side panels so the pre-drilled holes match perfectly. Insert the carriage bolts from the outside in. This ensures that the smooth head of the bolt is on the exterior, preventing unauthorized removal. Keep the bolts finger-tight at this stage to allow for adjustments later.
Installing Top and Bottom Plates
With the help of a second person, stand the three-sided frame upright. Slide the bottom plate into position first. This plate often acts as the primary support for the door sill. Next, install the top plate. The top plate adds structural rigidity and prevents the side panels from bowing outward. If you are installing personal mesh lockers, ensure the ventilation gaps are unobstructed.
Interior Shelving and Dividers
If your configuration includes interior shelves, install them before the door. Shelves act as internal braces that help maintain the squareness of the unit. Ensure that each shelf is level and securely bolted to the side panels. This is especially important for heavy-duty industrial applications where shelves may hold heavy tools or parts.
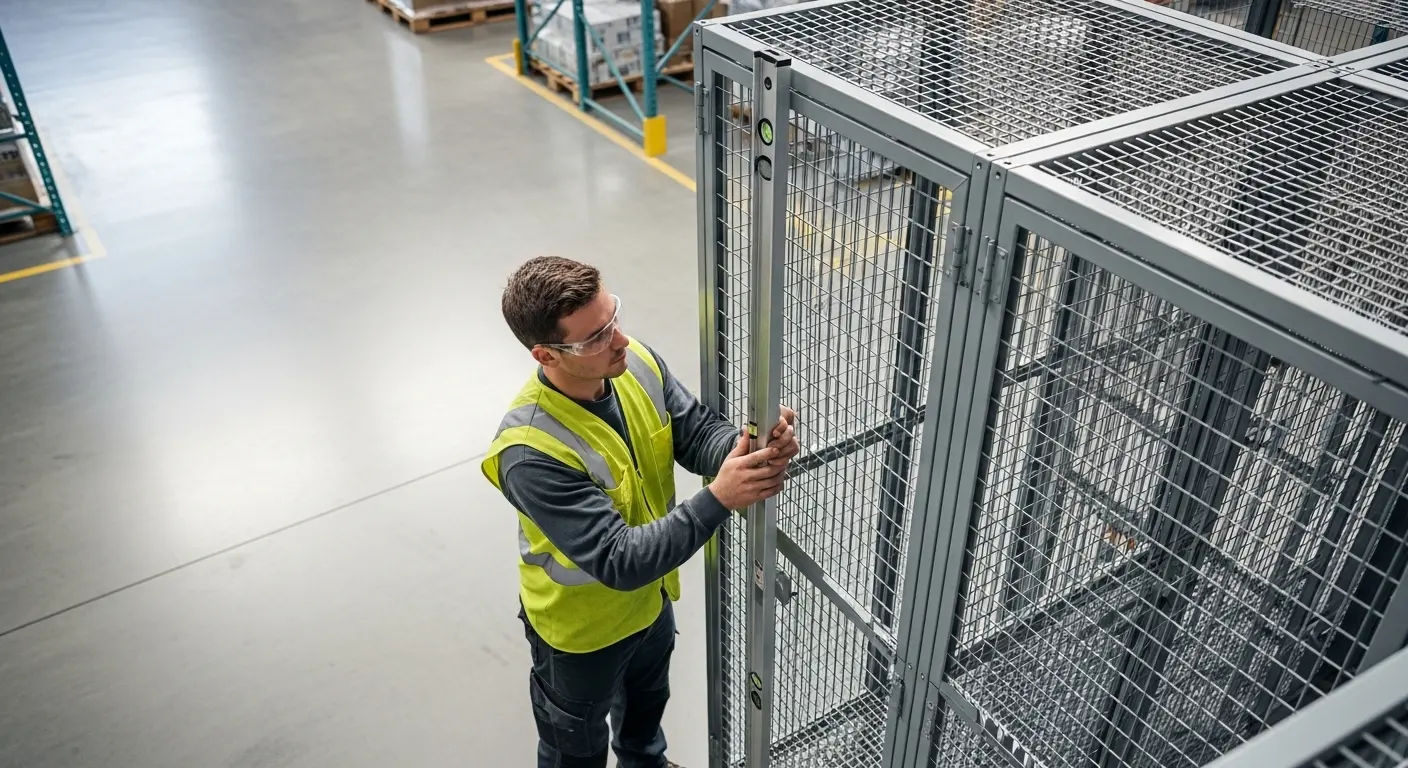
The Critical Squaring Process
Squaring the unit is the most important step in the entire installation. A unit that is not square will have doors that rub, latches that fail, and a shortened lifespan. You must verify squareness in three dimensions: width, depth, and height.
Measuring Diagonals
The easiest way to check for squareness is by measuring the diagonals of the front opening. Use a tape measure to check from the top-left corner to the bottom-right corner. Then, check from the top-right to the bottom-left. If the measurements are not identical, the frame is "racked." You must push or pull the frame until the diagonals match within 1/16 of an inch.
Using the Master Level
Once the diagonals are set, use your 4-foot level to check the vertical "plumb" of the side panels. Check both the front edge and the back edge. If the locker leans forward or backward, it will put undue stress on the anchors. Adjust the shims under the base until the bubble on your level is perfectly centered.
Final Bolt Tightening
Only after the unit is perfectly square and plumb should you tighten the bolts with your impact driver. Start from the bottom and work your way up. This prevents the frame from shifting as you apply torque. Re-check the squareness after every five bolts to ensure nothing has moved. Precision at this stage defines a high-quality wire locker assembly.
Anchoring Techniques for Floor and Wall
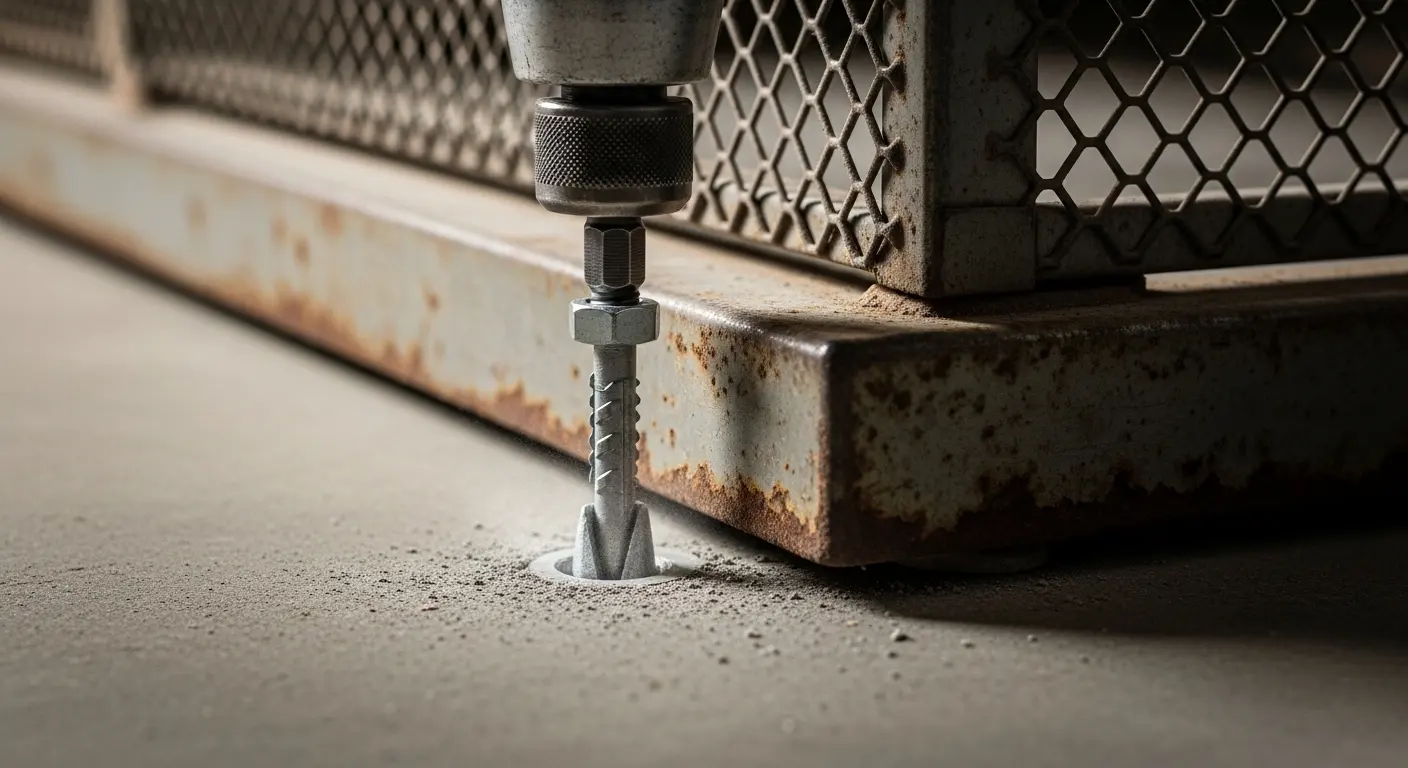
Anchoring is what transforms a metal frame into a permanent industrial asset. You must follow specific depth and spacing requirements to meet building codes. This is particularly true in areas with high seismic activity or heavy machinery traffic.
Securing Wire Lockers to the Floor
Use your hammer drill to create holes through the base plate into the concrete. Vacuum out the dust from the holes to ensure a strong bond. Insert your 3/8" wedge anchors and tap them in with a hammer. Tighten the nut to the manufacturer’s specified torque. According to OSHA 1910.141, all storage units must be securely anchored to prevent tipping hazards.
Wall Mounting Procedures
If the lockers are against a wall, use wall brackets to secure the back panel. This adds a second layer of safety. For masonry walls, use expansion sleeves. For steel studs, ensure you are hitting the center of the stud for maximum pull-out resistance. This dual-anchoring method is standard for industrial mesh locker systems.
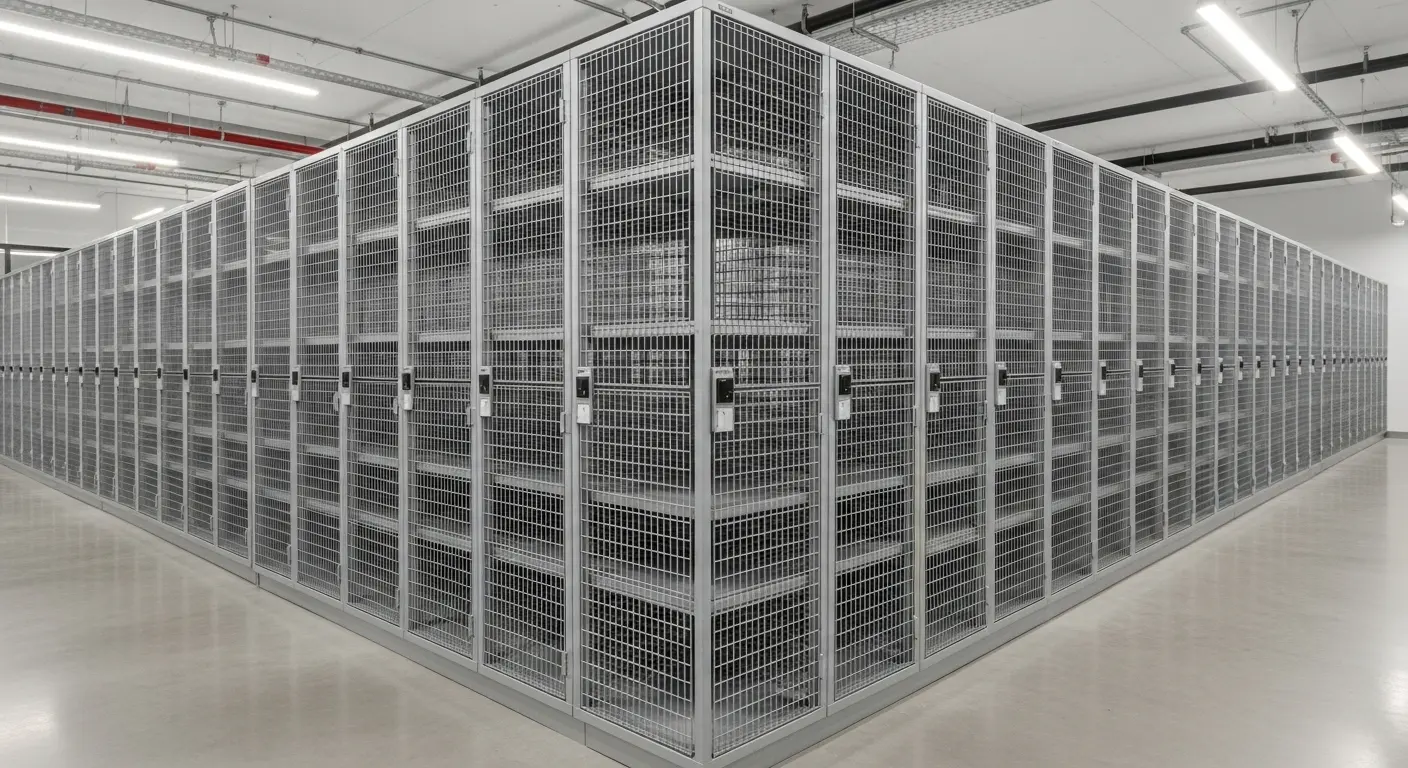
Back-to-Back Installation
In large warehouses, lockers are often installed back-to-back in the middle of the floor. In this configuration, you should bolt the units to each other through the back panels. This creates a much wider, more stable footprint. You still need to anchor each unit to the floor, but the combined mass significantly increases safety and rigidity.
Safety and Regulatory Compliance
Every industrial installation must adhere to local and federal safety standards. Failure to comply can lead to fines or, more importantly, workplace injuries. We recommend reviewing these standards before finalizing your project.
OSHA Requirements for Storage
OSHA focuses on the stability and load-bearing capacity of storage units. They require that lockers be free from sharp protrusions and securely anchored. Furthermore, the path in front of the lockers must remain clear for emergency egress. If you are installing lockers in school gyms, ensure you follow ADA accessibility guidelines for reach height.
Seismic Bracing Standards
In seismic zones, standard anchoring may not be enough. The FEMA E-74 guide recommends specialized bracing for tall storage units. This often involves diagonal tension cables or heavy-duty top-mounting brackets. These measures ensure the units do not collapse during lateral movement. Always check your local building codes for specific seismic requirements.
Fire Safety and Sprinkler Penetration
One of the primary benefits of wire mesh is its "open" design. This allows water from overhead sprinklers to penetrate the unit in the event of a fire. Most fire marshals require at least 70% open area for mesh storage. Verify that your ventilation lockers meet these NFPA requirements during the planning phase.
How do you align wire mesh locker doors?
Aligning doors involves adjusting the vertical plumb of the frame until the door sits centered within the opening. If a door rubs on the bottom, you must raise the opposite corner using shims. Once the door swings freely, check the latch engagement to ensure it locks securely without excessive force.
Adjusting Hinge Tension
Some industrial lockers feature adjustable hinges. If your doors are sagging, you can often correct the issue by tightening the hinge pins. Ensure that the door is level with the top plate. If the hinges are welded, your only option for adjustment is to re-square the entire frame. This is why the squaring process mentioned earlier is so vital.
Troubleshooting Latch Failures
If the latch does not catch, the unit may be "bowed" in the middle. This happens when the side panels are squeezed too tightly during assembly. Loosen the middle bolts slightly and check if the latch operates better. A properly aligned door should close with a light push and stay locked under tension.
Final Quality Audit
Walk through the entire bank and test every single door. Check for smooth operation and secure latching. Ensure there are no sharp edges or loose bolts. This final audit is your opportunity to fix minor issues before they become major complaints from facility staff.
Maintenance and Long-Term Care
Even the best installation requires periodic maintenance to stay in top condition. Industrial environments are harsh, and constant use can loosen hardware over time.
| Task | Frequency | Description |
| Bolt Inspection | Quarterly | Tighten any loose carriage bolts in the frame. |
| Anchor Check | Annually | Verify that floor anchors haven't vibrated loose. |
| Lubrication | Bi-Annually | Apply dry silicone spray to hinges and latches. |
| Cleaning | Monthly | Wipe down antibacterial lockers with non-corrosive cleaner. |
Preventing Corrosion
In humid or coastal environments, even zinc-plated steel can show signs of rust over time. Inspect the mesh for any chips in the coating. Touch up these areas with a rust-inhibiting paint immediately. This prevents oxidation from spreading and compromising the structural integrity of the metal lockers.
Hardware Replacement
Over years of heavy use, bolts can strip or anchors can lose their grip. Keep a small supply of replacement hardware on hand. If an anchor fails, do not reuse the same hole. Drill a new hole at least three inches away to ensure the concrete has enough strength to hold the new anchor.
FAQ Section
Can wire mesh lockers be installed on uneven concrete?
Yes, you can install wire mesh lockers on uneven floors by using industrial shims. You must place the shims under the base plates at the anchoring points. This levels the unit and prevents the frame from twisting, which is essential for proper door operation.
What size anchors are best for wire lockers?
The industry standard for industrial wire lockers is a 3/8" diameter concrete wedge anchor. These anchors provide the pull-out strength required by safety regulations. Always ensure the anchor is long enough to penetrate at least 2.5 inches into the concrete slab.
Do I need to bolt wire lockers to the wall?
While floor anchoring provides significant stability, wall anchoring is recommended for single rows of lockers. It provides an extra layer of protection against tipping, especially in environments where users might climb on the mesh. For many school and government contracts, wall anchoring is mandatory.
How do I prevent doors from rubbing against the frame?
Door rubbing is almost always caused by a frame that is out of square. To fix this, loosen the frame bolts and use a level to re-adjust the unit until it is perfectly plumb. Once the door moves freely, tighten the bolts back down while maintaining the square position.
Are special tools needed for welded wire panels?
Most installations can be completed with standard hand tools and a hammer drill. However, using a high-torque impact driver and a 4-foot master level will produce much better results. These specialized tools help you maintain the precision required for large-scale industrial setups.
Conclusion
A professional approach to how to install wire mesh lockers focuses on three core pillars: leveling, squaring, and anchoring. By starting with a clean site and using high-quality zinc-plated steel hardware, you ensure your storage system is safe and reliable. Remember that a perfectly square frame is the only way to prevent door alignment issues and maintain industrial safety compliance.
If you need high-performance storage solutions, explore our selection of metal lockers or contact our engineering team. We are ready to help you plan your next facility layout with precision and expertise.